Sunday, March 31, 2013

Fitting feature panels

And.... done!! The Green Chai Cardi is finally off the hook and safely stashed in Mum's birthday/Easter goodie bag. It looks amazing :) Very happy with it.

Finished! The Green Chai Cardi
Just before Easter, one of our regulars brought a top in to be made up. It was a clever design (from the Debbie Bliss Andes book) which included a feature cable that ran around the top of the neck.
The usual way to fit something like this is to:
  1. Sew or pin the ends of the band together.
  2. Pin the band evenly into place around the neck.
  3. Sew the band to the neck edge, using a mattress stitch seam.
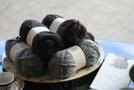
Debbie Bliss Andes - top with feature cable
Sadly, in this case, the band was a fraction too long for the neck edge of the garment. You can see the little leftover bit in the photo - barely 2cm long, but enough to make the cable look cramped and bunchy when I set it in using the above method.

I tried to unpick it to pull out the extra bit and discovered that Andes is hopeless to unravel! I couldn't get the knot undone for anything. In the end, with Easter looming, I bit the bullet and contacted the customer: would she be OK if I cut the extra bit off? (I didn't mention that I actually couldn't think of any alternative that would leave her with a sensible looking garment). Luckily, she OK'd it - I cut off the extra and cast off along the cut edge. I could then set the band into place and finish the garment off.

This got me thinking about tricks to avoid the nuisance of feature pieces that don't quite fit. The sideways cable is a reasonably common one - in her early books, Jo Sharp designed cardigans with a separate band and collar that had to be sewn on and one of the recent Rowan magazines has several designs that included a feature panel in a different yarn that had to be slotted in to the final garment.

In a perfect world, we'd all do our tension squares and knit perfectly even pieces that would turn out to be exactly the correct size and fit together effortlessly like a soft, woolly jigsaw. In reality, even quite skilled and experienced knitters can find themselves with a feature piece that is just that little bit too long, too wide, too short or too narrow!

There are a few ways to minimise the nuisance value of the feature piece:
  1. Leave a nice, long end and a loose knot when you cast off the feature piece. That way, if it's not quite right, you will easily be able to unravel a few rows to make it a perfect fit - or pull out the whole thing and start over!

  2. Intarsia is not just for colour blocks. One of my first Jo Sharp projects was a cardigan with a long button band that was supposed to be knitted afterwards and sewn on. Instead of driving myself mad trying to knit a band of the correct length and fit it into place, I knitted the band at the same time as the fronts, using 3.25mm double pointed needles and a separate ball of yarn. When I reached the end of the band, I twisted the yarn around the yarn I was using for the main body of the garment, as you would for two intarsia blocks. Although it was a bit fiddly, it was worth the effort when I cast off two fronts with perfectly fitted bands and no sewing up to do!

  3. Another option (which would have worked well for the cable band above!) is to pick up a stitch into the body then K2tog/sl K1 psso at the end of each row. This effectively knits your band into place as you go. The only disadvantages are that you have the weight of the made-up garment hanging from your needles, and it may not give a smooth/invisible join.
With those options in mind, I might go and spend the last few hours of my Easter break raiding my stash... There are a lot of odds and ends in there that could be used for Rowan feature panels if I find the right base yarn! Happy Easter :)

Saturday, March 16, 2013

Sleeves

In the end, I decided to bite the bullet and finish the Green Chai Cardi. I need to have faith in my skills as a crocheter and assume that it will fit - instead of leaving my options open, then spending Mum's entire next visit frantically trying to get it finished.

Did I mention that I hated the sleeves? I hated the sleeves.

The reason was that they didn't come out even. They weren't badly out of alignment, but they were visibly different. I looked at them for a week, then cracked and ripped them out. Then, while the unravelled wool was soaking in a mix of warm water and wool mix to get the crinkles out, I sat down to see if I could work out a way of setting the sleeves straight into the garment. As you may have guessed from the photo below, yes I could. :)

Green Chai Cardi with crocheted-in sleeves
To provide a foundation for the sleeves, I did a row of double crochet into the broomstick lace (one dc for each chain in the foundation chain in the original sleeve pattern). I made sure that the double crochets were evenly spaced to either side of the seam (8 dc each side and 1 dc on the seam). Then I simply followed the pattern, working into the double crochets.

When the pattern changed from rows to rounds, I worked more double crochets to form a foundation for the round. It was actually easier than following the pattern - I found the whole "row of chain and join with a treble" a bit confusing, it took me a couple of goes to get it each time.

I also adapted an old knitter's trick of doing both the sleeves at once. This is a great tip that I got from my great-aunt, who was still knitting strong into her 90s. Her tip was to cast on both the sleeves at once (using two separate balls of yarn) and to work them at the same time. The idea is that you're unlikely to end up increasing on the right sleeve, then forgetting to increase on the left if you have both the sleeves on the needles at the same time.

Shawl Collar Cardigan - sleeves
This also works well for cardigan fronts - in fact, for pretty much anything where you have two knitted pieces that need to be absolutely identical. (Of course, it's no guarantee that they won't be identically wrong - but that is easier to hide that two uneven sleeves or fronts).

The crochet equivalent is to work a round - put a stitch marker or safety pin into the stitch to stop your work unravelling - take the hook out, then work the same round on the other sleeve. It seems to working quite well - I feel like the sleeves look far more even, and this also saves me from having to scribble notes about any 'fixes' that I've needed to make the pattern work out.

Lady Eleanor stole
While I was waiting for the wool to dry out after I frogged the sleeves, I had some time to spend on the Lady Eleanor Entrelac Stole.

Once I'd worked two tiers, the logic of it suddenly clicked and now I'm happily picking the stole up whenever I've got a spare moment and working a couple of rectangles. The Noro yarn is lovely and warm - very much looking forward to having this in my wardrobe by winter time! The pattern says to work 35 tiers, but I'm hoping I might have the yarn to make it 40. Not because I need a particularly long stole, but just because I'm really enjoying the pattern now that I've mastered it. :)


Stop taking photos and give us back our sofa!!
My next step will be to put together a simple entrelac design and block in at least one class for the winter. I'm thinking of doing something with one of the Jo Sharp tweeds... but more on that in another blog post. For now, I need to open the shop and give the sofa back to its rightful owners (see photo left!).