Friday, March 14, 2014

Reality TV goes wild....

Last year, I came across a new trend in reality TV - slow TV. Norway was televising a knitathon, where several groups of competitors attempted to beat the (Australian-held!) world record for knitting a jumper, from shearing the sheep to a finished garment.

Given that the speedy Aussies managed to complete this feat in 4 hours and 51 minutes, Norwegian knitting aficionados were in for a long evening. Eventually, the jumper was triumphantly handed over, completed, in about five hours - presumably much to the relief of viewers, who must have been starting to run out of drinks and snacks.

Slow TV is an interesting example of the trend to step back from the constant rush of modern life and make a conscious decision to do things which require the investment of time and effort. Norway's other efforts in this area make the knitathon look positively manic - televised train and ship journeys, shown unedited in real time, go for days and a four hour program about firewood was followed up with eight hours of footage of a log fire.

While I don't think our TV stations are quite ready to embrace the concept of 14 day ship voyages shown in real time, Australians certainly haven't been slow to adopt the concept of slow clothing (i.e. handknitted, handcrocheted and hand-sewn).The only question is: how slow is too slow? Many crafters are time-poor, working long hours with long commutes and family responsibilities that take up much of their leisure time. While slow fashion is all very well and good as a philosophy, these people don't want to spend years knitting a 4-ply jumper on teeny, tiny needles - they want a quick project which they can pick up whenever they have a moment. Other knitters are prepared to make the time to knit intricate 2-ply lace patterns because they love their craft so much!

So which type of crafter are you?

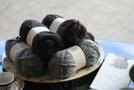
Vest in Wendy's Supreme Chunky Cotton -
took approximately eight hours to complete

Time poor:

Try projects in chunky and superchunky yarns, such as Rowan's Big Wool, Naturally Yarns Naturelle Chunky, Wendy's Supreme Chunky Cotton or Misti Alpaca's Tonos Chunky. You can also do some amazing 'lace' knits using big needles/hooks (15mm and larger) and a fine yarn. Try the Kaalund range of patterns for some great examples!

You may want to learn to knit continental style for greater speed; crocheters may want to experiment with tricot/Tunisian crochet and/or broomstick lace for fast, easy projects.


Craft lover:

Foxy Sweater by Marie Wallin (c) Rowan
You will probably love our Rowan Kidsilk Haze! Rowan designer Marie Wallin has designed some absolutely incredible garments in this super-fine mohair yarn. Kaalund Classic Two will work for you as well - except you'll be crafting it on 2.5mm hooks (or needles) instead of broomsticks! Or you might want to do some summer knits in a fine bamboo or cotton yarn - we have the Cleckheaton 100% Bamboo, Atlante Bamboo and some Rowan 4ply Cotton and Cotton Glace to keep you busy!

As far as techniques go - try traditional lace knitting techniques, such as Orenburg lace!

Of course, we've also got 'in between' options for people who fall between the two extremes - but that's a subject for another blog post. Have a happy crafting winter!

Friday, January 31, 2014

Plan ahead!

Today I opened the shop for the first time in 2014. I have to say, starting back at work in the middle of a heatwave is not a brilliant plan - however, it has given me a lot of time for planning other (more important) things, such as what I am going to knit this year!

Most of my subscribers are based in Oz, and therefore don't need to be told that Aussie summers are absolutely vicious. If anyone from overseas is reading this post - please take my word for it, Aussie summers are absolutely vicious. February is basically a series of heatwaves, with temperatures in the high 30s/low 40s (celsius, not farenheit!), tacked together with the odd cool day here and there. To get a better idea of how bad that can be, compare the fatalities from the latest Victorian heat wave to the road toll for the same period... (heat waves vs cars).

Plymouth, from Rowan Magazine 52 (c) Rowan Designs
This is not good knitting weather. However, if you have a good air-conditioner and/or a small project, you don't have to put down your needles altogether. My summer project is a tea cosy for a friend, which I promised her last winter as a birthday gift (ooops!). It is a nice small project, with a bit of colourwork to keep me motivated. That should tide me through the worst of the heat.

Coming into autumn, I need to start knitting a jumper. Again, it's a promised birthday present, and it's roughly six months overdue. In fact, it's for the husband of the friend who was promised the tea cosy... this may become socially awkward if I don't knit reasonably quickly! Luckily, I'm doing a show this autumn, so will have lots of opportunities to knit while waiting at cold bus stops and in drafty dressing rooms. He's going to get either a Plymouth or a Fastnet... As part of my planning day, I am looking through the patterns, trying to work out which will be easiest to knit in transit!

Fastnet, from Rowan Magazine 52 (c) Rowan Designs


At the same time, I'm still working on the Snug Fall Cosy. The Cosy was a learning project - I wanted to practise beading, grafting stitches, and knitting and unravelling fringes. I've finished the waist band and done the graft, which was interesting - I found it fiddlier than I'd expected and wasn't all that confident that I'd stitched the ends of the band together securely. It has held together well though, and I'm looking forward to having another two goes at the technique: the neck band has another end-to-start graft, and the top of the body is grafted onto the neck band as a top-to-side graft. So I should have the technique completely under control by the time I finish the garment! The unravelled fringe looks pretty cool too :)

I'm also working on my Lady Eleanor Entrelac Stole. I'm completely confident now working the two tiers of rectangles, but might need to do another couple of projects to get my hands around the base and final tiers of triangles. I have the Tweedy Garterlac Scarf class project to help me master those, so no worries there.

By the time I've moved these through my queue, it will be winter. I'll have to decide whether or not to knit a jumper and hope to get it finished with a few more cold days to go, or to skip straight to knitting a summer top. I've got the yarn to knit a Lead in grey, crimson and jade green - I've also got some Cotton Rope, which I bought several years ago when I needed.... slightly less yarn.... to make a jumper. I won't get a jumper out of it now, but maybe a sleeveless top is feasible. Certainly better than leaving it sitting in the wardrobe!!

Lead, from Rowan Magazine 52 (c) Rowan Designs

Time for me to wind up this planning session and close the shop... Stay safe in the heat, and hopefully, we'll see you for a planning session soon!

Friday, October 11, 2013

No substitution for happiness

I'd better start this post by acknowledging Suge Knight as the source of this quote. Mr Knight runs Black Kapital and Death Row Records, looks after a number of major U.S. gangsta rap acts, gave us such gems of wisdom as "In prison, you get the chance to see who really loves you" and (perhaps more relevantly) has a rap sheet going back to 1996 for various violent offences. So thank you Mr Knight for our tag line, please don't come and visit me to talk about copyright infringements*...

This post is actually about yarn substitution. That wonderful journey of discovery, that begins when you find the absolute perfect pattern - in a yarn that you just cannot find anywhere!! Sometimes the yarn is an exotic something-or-other that isn't imported into Australia: sometimes the yarn has been discontinued and you can't find a shop that has enough of it to make your dream garment.

In this scenario, the internet is your friend. Once upon a time, things that weren't imported into Australia were as hard to get hold of as bunyips. Nowadays, a quick internet search will normally turn up a little Midwest shop that stocks the exact brand of quiviut required for your pattern, and Ravelry has a page where crafters can sell or swap from their stash, so 'discontinued' doesn't necessarily mean 'gone forever'.

However, sometimes even the internet can't save you, and you need to find an acceptable substitute yarn. In that case, read on...

Step 1: Go to Yarndex and find out all you can about the original yarn. Yarndex has data for an amazing number of current and discontinued yarns, and you should be able to find the yardage, fibre, texture, gauge and recommended needle size for the majority of yarns here. (If you can't, Google the original yarn name - this information will be out there somewhere!).

Step 2: Google for yarns with a similar fibre content. This will find you a bunch of yarns that (at least in theory) will behave like the original yarn. You can substitute across fibres, but you may find that the garment does not turn out as intended - for example, if you substitute a cotton or silk yarn for wool, you will find that the garment becomes much stiffer and less elastic. A different fibre may also detract from a decorative stitch pattern: the example below relies on a bulky cotton yarn to give very sharp stitch definition. Wool is always somewhat fuzzier than cotton, which would make the lace less distinctive.

Wendy's Chunky Cotton - lace patternStep 3: Find yarns that knit to the same gauge as your original yarn on the same size needles. This also applies if you crochet or tricot - if it knits up the same (in theory), it will also crochet or tricot to the correct tension.
Wendy's Chunky Cotton - Lace Pattern
Step 4: Work out the yardage/meterage - will you need more or fewer balls than the original pattern? Even experienced knitters can get caught out and buy the number of balls/grams required - only to find that the substitute yarn is a couple of metres/ball shorter than the original and they can't complete their garment.

You now have a selection of yarns which are theoretically acceptable substitutes for the original. Go forth and yarn-shop!! However, you need to be prepared to knit test swatches and to accept the risk that you'll end up with a lemon. The guidelines above have mostly worked for me, but now and then you find that 'similar to' is a long way from 'the same as'. If that happens, I usually turn back to the internet to find a pattern for my new acquisition - and another substitute for my dream yarn.

* Suge Knight is notorious (among other things) for allegedly threatening to toss Vanilla Ice off a hotel balcony because Vanilla Ice had used some material from one of Suge's clients in his song "Ice Ice Baby".

Saturday, July 20, 2013

Moebius... Entrelac... Toll Road!! Moebius... Entrelac... Market!!


One thing you can say for running a knitting shop, you will never lack for variety!! Over the past month, I've designed two new patterns for classes, accepted an invite to run a stall at the Luna Night Market and received a letter from the government telling me that my home is going to be demolished as part of the East-West link... admittedly, that last is not directly related to the shop, but it is another interesting challenge that I'm going to have to fit in around the winter rush.

Cowl-Leidoscope
(c) Andrea Tappe
This is the Cowl-leidoscope, the project for the Moebius Cast Ons class. We've run the Moebius class once already (first Sunday afternoon in July) and we'll be running it again on the first Sunday afternoon in September. The class covers five ways to create a Moebius scarf or shawl: participants can knit the Cowl-leidoscope as part of the session.

In alternate months (August and October), we'll be running an introduction to entrelac - sadly, the demo is not at a stage where it's ready to photograph. (That's another way of saying I've only just started casting it on this afternoon!). Expect to see a pic of the Tweedy Garterlac Scarf soon on our FB page!

When it's finished, it will look vaguely like the photo below- except it will be striped in a finer tweed yarn and done in squares, not rectangles... so only very vaguely like!!

What entrelac looks like
The Luna Night Market has been our next challenge - for four Wednesday Nights in August, we will be at Stall G21 in J Shed with our brand new Giant Yarn Crate from 5pm to 10pm. This is going to make Wednesday a pretty long day, since I usually start at 5:30am with a circuit at the local gym... But I'm sure I can survive for one month!

The goal with the market is to have a good range of projects, with things to tempt impulse purchasers while also making sure that people know that we have the wherewithal to help them knit, crochet or tricot a full garment. The last weekend in July will probably be dedicated to making up Spiderweb Scarf packs with our stock of Rare Comfort Kid Mohair, putting together a Pom-Pom and French Knitter kit for the kids and maybe whipping up a kit for the Rare Yarns Lace Gauntlets or a Misti Alpaca two-yarn scarf... I have to think very hard about this, since there's only so much I can fit in the crate! Apparently anything over 300kgs and it's likely to collapse ;)
Spiderweb ScarfTo market, to market...


The birthday cape - about half finished
And finally... the toll road. Not much to say there, except to hope that I'm going to get a friend's birthday present finished much faster than I expected, since I'm crocheting on the way to and from the protests - and sometimes crocheting during them as well. I figure if Madame Defarge could knit in the shadow of the guillotine, the least I can do is crochet woolly capes as I wait for the bulldozers to show up!

The cape is a nifty little thing that my friend picked off the Garnstudio website - I didn't have a colour in Twilleys 100% chunky wool that she liked, but I've substituted one of the New Zealand Naturally yarns, which is working extremely well. It's one of those patterns where you have to have faith - I crocheted the first couple of rows and was convinced that the pattern and/or the substitution was a dud - it looked terrible!! However, over time, the pattern started to emerge and the cape started to look more like the photograph... a good analogy for the situation with the toll road - it has started out looking pretty awful, but hopefully it will improve over time!!


Saturday, June 22, 2013

Making ends disappear

For the last three weeks, I've been making up a T-shirt. Yep, T-shirt. Three weeks.

The problem is that it's a stripy T-shirt*.  The front and the back both have two repeats of a 64 row stripe pattern. The sleeves have a shorter stripe pattern, but there are still a lot of stripes, since most of the stripes are only one or two rows wide. And where there are stripes, there are ends to be sewn in. Lots of ends. Finicky, fiddly little 4-ply cotton ends...

The problem is finding a way to thread the ends into the work so that they don't pull loose and scratch or unravel, while also avoiding bulking up the seams too much with run-in ends. There are something like 200 ends in this garment (66 each for the front and back, and 30 for each sleeve), and that is a lot to hide in one seam.

Normally, if I was working stripes, I'd weave the unused colour up the side of the work. However, this trick only works with two or three colours - with 12 colours, it is less effective. In fact, when your stripes start and finish on opposite sides of the garment, it is completely useless!

Of course, now that I've finished the top, I've found an excellent tip on managing ends in striped work. In a recent Knitting Daily newsletter, one of their editors suggested carrying the cut-off ends along the back of your row, in the same way that you carry the colours in fairisle work.

This would achieve exactly the same result as stitching my ends into the purl bumps on the reverse side of my work - but it would achieve it at the same time as I was knitting, which would make the entire thing much less painful.


Since my masochism knows no bounds, I will get a chance to use this technique when I delve into my stash to knit up Glade later this year. I've been hesitant to start work on it, as my hands ache whenever I knit with fine needles for more than a couple of minutes. The obvious answer to that is to start knitting right away - four or five minutes of knitting every day should have me a finished jumper in a bit over a year, all going well!

As a break from sewing in teeny, tiny ends, I've been working on Moebius cast ons and entrelac patterns for our new classes. It will be an exciting change from beginner classes - and from running in ends! 

**The T-shirt is Marie Wallin's lovely Dauphine (from Rowan magazine 43, published in 2008). Looking forward to taking a photo and putting it up here - once I finish running in those blasted ends and actually get to sew a seam!!

Friday, June 7, 2013

Making up is hard to do

The other day, a customer came in with her first ever jumper and made me aware of the limitations of making up instructions! The pattern said "Join the shoulder seams". With no guidance as to what shoulder seams actually were, she'd accidentally attached part of the front neck to the back of the garment. Very easily fixed, but it made me think - patterns for newer knitters really, really need to include diagrams showing how the pieces fit together.

Shoulder seams
When you look at a cast-off back or front, you will notice that there are 'steps' up the top of the knitted piece. Usually, the two pieces fit together with the highest steps joining (the neck edge), then the next, all the way down to the lowest (the sleeve edge).

This is the shoulder seam. To join the two pieces, thread a wool needle with the same yarn you used to knit the garment and sew a horizontal seam. Berrocco have put together a very good video on how to do this - I don't want to even try to write it out, it is much easier to show than to explain. Personally, I sew from the edge into the neck, but there is no right or wrong direction as far as I know.

Once you have the shoulder seam in place, put your garment flat on a firm surface. If I'm making something up for myself, I usually sit it on the bed or the sofa - for customers, I'll lay the work out on the counter just to make sure that I have it perfectly flat and even.

Take the cast off edge of the sleeve and fold it in half: pin the stitch at the halfway point to the shoulder seam.

The sleeve will have two 'points' about halfway down, where you did your first shaping cast offs. Pin the points to the matching points on the front and back of the garment. (If you look at the photo below, you can see the point on the back clearly).

Sleeve ready to be pinned

Sew the top of the sleeve into place: I usually begin at the centre and work around to each point.

Once you've set the tops of the sleeves in, pin each side. I usually pin the hem, the armpit and the cuff: you may want more pins to hold the work more securely. Sew one long mattress stitch seam from the hem up to the armpit, then down the sleeve to the cuff to finish your garment.

Thread any loose ends into the seams and you're done!

If you want more information, there's a good article about seaming on the Vogue Knitting website with illustrations and Interweave TV has a Seaming Primer episode that is pretty easy to follow. I think it's always worthwhile taking a bit of time to review seaming techniques before you start making something up - after going to all the effort of knitting or crocheting a garment, you want the finishing to be as perfect as possible!

Jo Sharp Moebius Scarf (worn as cowl) Jo Sharp Moebius Scarf (worn long)
In other news, the Jo Sharp Moebius Scarf is off the needles. I love it! Funny, I would never in a million years have thought to knit it for myself, but it has quickly become my all-time favourite scarf. Very warm and soft!

Unfortunately, my Moebius class prep is not coming along quite so well. Garnstudio has an idiot-proof Moebius cast on - unfortunately, in Norway, they have really smart idiots. 
When I try it, the continental cast on is so tight that I can't pick up the stitches into it. I'm working on the Cat Bordhi idiot-proof Moebius cast on after I finish this blog - maybe I can get a version of that which won't leave half the class fighting to drive their needles into a cast on edge? Stay tuned...

Saturday, May 4, 2013

Boiling needles

Last week, I posted about the Jo Sharp Moebius Scarf and the different ways of casting on to create a Moebius loop. My inability to get the twist to work niggled at me, and I ended up going through my stash and pulling out some Silkroad Aran Tweed that I had left over from one of Dad's jumpers.

Of course, because there was no-one watching, this time I got it right on the first try. I was so excited that I abandoned my lifelong resolution never to upload a bad, home-filmed craft video to the internet - I pulled out the iPhone and did a short movie of me knitting the first round with the twist.

The two clips below are the only parts of the movie where you actually have any hope of working out what the heck I'm doing: Jane Campion is never going to lose any sleep over me! Basically, all I did was cast on (using a cable cast on), twist the cast on row about halfway along, then start knitting in moss stitch.

If you have a look at some of the stills below, it might be clearer!


Luckily, I chose the 'right' needles. The cables on Birch circular needles tend to kink, making it difficult to avoid twisting your rounds. Normally, when I buy a new Birch circular needle, I soak the cable in boiling water to get it to straighten. In this case, I didn't want it to be straight, I wanted help to get my twist - and sure enough I did. Have a look at the cast on below...

Cast on - Moebius Scarf
You can see that the cast on row twists up and around because of the kinks in the cable joining the needles. If you look closely, you can see where the work twists (on the right hand side of the picture). This was before I even touched it - it was very easy to see where the work naturally wanted to twist and to help it along.
Moebius twist - close up

With such an obvious hint, it was pretty obvious where I needed to grab the work and twist it!

Ironically, with a higher quality circular needle (such as the Clover needles) this is much harder to do - the cable sits very flat, and any kinks in the cable drop out naturally as soon as you open the packet. When I attempted my demo twist last week, I was using a circular Clover needle and I found that the work would move back into place no matter how much I tried to twist it. Usually, this is a good thing, but if you want a Moebius, it is a complete disaster!

I knitted the first round very easily, keeping the twist in place - if you look at the photo below, you can see the twist at the top of the picture. Ironically, now that I've got a couple of rounds on the needle, I'm tempted to whip it out of the work, take it into the kitchen and douse it with boiling water - although the twisty cable is very helpful when setting up a Moebius loop, it is a nuisance once the first round has been set up.

Moebius - first round
On the other hand, if I leave the needle as it is, it will be perfect for the next two scarves that I plan to knit (one following the Garnstudio instructions, and one following Cat Bordhi's method). Keep an eye out at Brunswick Savers for an influx of Moebius scarves this winter!!